Macs are fast, high-performing, and reliable computers; therefore, they are trusted by many professional individuals and brands.

However, a device like Mac can only reach its maximum performance and efficiency if you know how to take care of it correctly and take time to learn its neatest features that can enhance your productivity.

Thus in this article, you will find a list of 10 quick and easy tips that will help improve your Mac's efficiency by keeping enough free storage space and applying such useful tips as to how to crop photos on mac.

Tip #1: Check Storage Space

Checking storage space should become a habit so that you learn to keep on track with it regularly. Knowing how much free disk space you have left is important because if you fall below 10% of free storage space, your Mac will become slow and start underperforming.

The easiest way to track your storage space is to click on the Apple icon, go to the option About This Mac, and click on the Storage tab.

Tip #2: Uninstall Apps You Do Not Use

Apps can take up quite a lot of space, and to make sure that you have enough free disk space and can easily find the apps you need, uninstall the ones you no longer use.

Look for two types of apps to uninstall. First, start with the game apps you have downloaded just for fun and never really play. Secondly, look for multiple apps of the same type, such as time-planning apps. If you have five different ones, you probably only use one.

Tip #3: Remove Large Files

Moving forward, remove large unneeded files to make more storage space on your Mac. To locate these files, you can go directly to the Downloads folder that stores all of the files that you download from the internet; thus, it may include quite a few one-time use files.

Also, in the Storage tab, you can click Manage that will open a new menu with four suggestions that can help clear system storage. The option called Reduce Clutter will guide you through large files and other documents that you might not need.

Tip #4: Clean Your Desktop

To become more efficient, keep a clean desktop. Maintaining hundreds of items on your screen will make it difficult to locate the files you are looking for. More to it, if you do not name your files properly, you may send the wrong file to a client of yours.

Also, the more thumbnails you have on your desktop, the slower your Mac becomes. To display every icon, the computer is using system resources, which slows down your Mac.

Tip #5: Empty the Trash Bin

If you have recently deleted a bunch of files to clear some system storage, do not forget to remove them from the Trash Bin as well.

Remember that as long as you keep the deleted files in the Trash Bin, they are still taking up disk space and slowing down your Mac, thus making you inefficient.

Tip #6: Use Cloud Storage

For creative people who work as graphic designers, photographers, or video editors, it may be difficult to keep enough free storage space. Therefore, another solution, such as using a cloud storage service, might be necessary.

More to it, using a cloud service will bring in more benefits, such as easy file access and sharing.

Tip #7: Invest in External Storage Solutions
However, to use a cloud storage service efficiently and without any annoying interruptions, you will need to ensure a strong network connection.

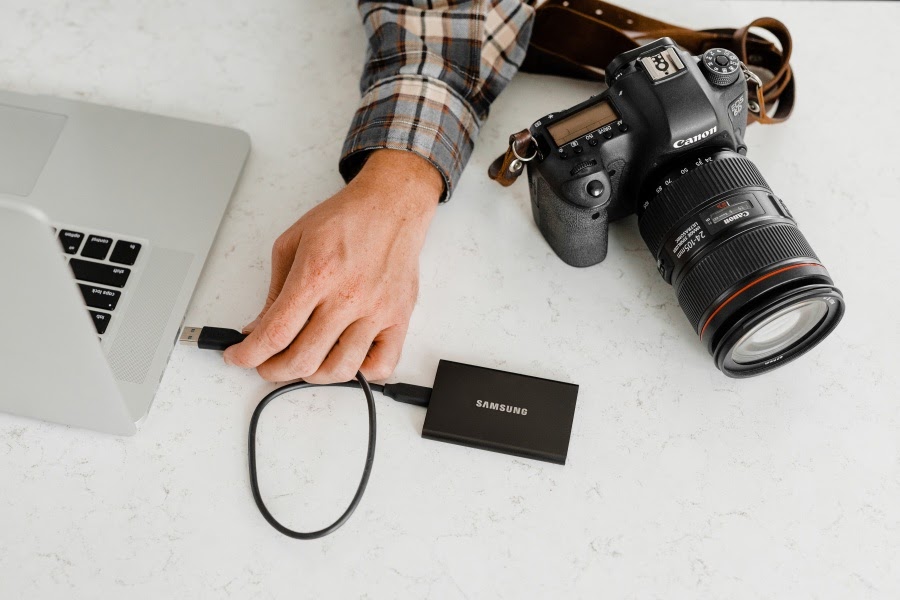
If that is not possible, you should consider investing in external storage solutions, for instance, external hard drives or USB keys. On the other hand, make sure you keep the files you use daily on your computer for fast access.

Tip #8: Use Streaming Services

Using such streaming services as Netflix or Spotify can help you keep more free disk space at all times and result in a better performing computer.

First of all, you will not have to download large media files to watch a movie or listen to an album by your favorite artist. Secondly, if you enjoy watching tv series, you will not have to worry about deleting the episodes that you have already watched.

Tip #9: Update the macOS Regularly

The Apple company has been working on developing and improving its devices and software for years and is still doing it constantly to provide you the best performance possible.

However, if you want to be using the best version of the device you own, you need to update the macOS regularly. Once you skip an update, you can find it in the System Preferences.

Tip #10: Learn How to Crop Images

You may think that you need to download photo editing software if you want to crop images on a Mac, but there is actually an easy way to do it without installing any new software.

The fastest method to crop images on your Mac is by using a built-in app called Preview. Once you open the image you want to crop, choose the Markup tools to cut out the part of the image that you want.

10 Efficiency Tips for Mac Users

speedier memory efficient ram slack

Popular team communication software Slack introduces a major update to its desktop app that mitigates the performance issues plaguing the app for so long. The new version now loads much faster on Windows and Mac, and eats a lot less memory, giving its millions of daily users a delightful experience when interacting the app.

Slack Drains Your RAM? It’s Time to Update Now

Slack team is rebuilding the app from the ground up, eliminating the resource-hogging bloats from its stack. The recent developments in Javascript in the past few years made it easier for team Slack to make the call and upgrade its client-side ecosystem, bringing the much-needed performance boost within the app.

“We want people to be able to run Slack alongside anything else they are using to get their job done and have that be easy, uncumbersome, delightful even. So we took a look at the environment we’re in. I think the other thing to note is that the ecosystem for client-side development has just changed a lot in the past five years. There have been some major updates to JavaScript and new technologies like React and Redux to make it easier to build dynamic web applications. We also wanted to update our stack to fit in with the modern paradigm.” — Jaime DeLanghe, Director of Product Management

Previous versions of Slack for Windows and Mac are noticeably slow for some. That’s especially true for those who have multiple Slack workplaces and channels to keep tabs on. This is due to the fact that Slack retrieves all conversations for each channel first before rendering the UI, thus, delaying your interaction to the app.

Now, Slack will only load data when needed, depending on which channel you’re on. The result: a speedier and memory-efficient user experience.

Slack is slated to release the new app in the coming weeks.

More than just Skype

Slack is a widely popular team communication tool used in a formal setting like workplace collaboration and remote communication. It got all the bells and whistles you can hope for when collaborating and working with remote team members on shared projects.

5 Handy Google Sheet Tricks To Help You Work Fast & Save Time

Slack Desktop App Gets Performance Boost — App Now Uses Less RAM, Loads A Lot Faster

If for some reason you want to restore that crucially important text message on iPhone that was deleted by accident or maybe you've bricked your phone and wanted to recover those important text messages, chances are you'll immediately hop back to your computer and look for backups to restore.

But what if you don't always have a scheduled backup and you desperately need to retrieve that lost text message?

Fret not! As dodgy as it may sound, you can fully recover deleted text messages on iPhone even if you don't have a backup. And best of all, you don't have to spend a penny to restore those deleted precious text message data.

How it's possible to recover text messages on iPhone

When you permanently delete a message on your iPhone, you're not actually deleting the data itself. What iOS' Message app does is it only removes the indexing file.

So you can imagine your actual SMS data still sits inside your iPhone's internal memory and can be fully restored even if that message is deleted.

iPhone Message Recovery: A FREE Text Message Recovery Tool for iOS That Actually Works

Everyone, meet iPhone Message Recovery. It's a tiny piece of app currently available for Mac that lets you recover accidentally deleted text messages on iPhone at no cost. I was told Windows version is in the works, so maybe a little wait is required for Windows users.

I nearly had to shun and skip this tool thinking maybe this is yet another garbage app that secretly installs malware instead of delivering the promised iPhone text message recovery as advertised. But the entire install file is just below 15MB so me being too skeptical had to give it a go.

To my surprise, iPhone Message Recovery actually works like a charm! After just a few scans, the app was able to recover my deleted text message and lets me preview those deleted text messages! Sweet.

Here's how to restore deleted text messages on iPhone without backup

  1. Download and install iPhone Message Recovery for Mac (14.6MB). It's FREE, no sign-ups needed.

  2. Launch iPhone Message Recovery on your Mac, it should prompt you like this

  3. Once installed, connect your iPhone to your Mac. It should automatically detect your iPhone

    There are two sources for text message data recovery: Device or Backup. Be sure you're selecting Device mode.

  4. Click Next, it should immediately start the scan. Analyzing your iPhone data can take a while, so wait for a few mins and do not disconnect your iPhone.

  5. As soon as you're done with the scan, the app prompts you this:

    If you're recovering just standard plain text message, just toggle Messages and click Next

  6. Let iPhone Message Recovery app do its thing and wait until you're taken to this screen

    You'll notice that two striked-through items being the deleted text messages. And see how I can easily preview them even if they're deleted inside my iPhone.

Wrapping it up

iPhone Message Recovery is not your typical dodgy data recovery app you've come to know from other data recovery apps. It's a fully functional data recovery app for iPhone that brilliantly recovers lost text messages data and even recover iMessage's photos and videos attachments in one go.

How To: Recover Deleted Text Messages on iPhone without Backup for FREE

If you're a traveler who wants to stay productive while on-the-go or you're a digital nomad who loves to mix leisure and work, chances are you'll need a decent power bank for your laptop more than you'd imagine.

An extra power bank that can charge your Mac or laptop ensures you have extra battery juices you can turn to when you needed to do last minute work while your laptop's battery is dead empty. A portable power bank that fully supports your Mac or Windows laptop is especially useful if you're in the most remote part of the country where rotational brownouts are expected.

In this article, we will show you top-of-the-line power banks for your Mac or Windows computer that guarantee to give you those extra hours without hurting your wallet. We specially hand-picked below's list with charging speed/time, safety, and capacity as criteria.

The Best Laptop Power Banks You Can Carry Anywhere

  1. Crave PowerPack Power Bank (50000mAh)

    Topping from this list is this 50,000mAh backup power bank from Crave PowerPack. Crave PowerPack CRVPP101 is your compact, high-density travel companion guaranteed to fully charge your devices anywhere you go. This power bank has two laptop power supply ports and universal compatibility with virtually any mobile devices.

    Capacity: 50,000mAh Laptop Compatibility: Acer, Asus, Compaq, Dell, Fujitsu, HP, IBM, Lenovo, NEC, Samsung, Sony, Toshiba (Apple Laptops draw > 5 Amps, not supported) Port Compatibility: 1 20V/3 Amp Port for Laptops

  2. Mophie Powerstation (22,000mAh)

    Powerstation AC is another strong contender under this category. This quick-charging emergency power bank offers you a legit AC port that gives your notebook or Mac a safe 100W power (110V) and a USB-C charging port that provides 30W power.

    5 Surprisingly Cheap IoT Devices to Easily Upgrade Your Home for Less

    Although not as big as Crave PowerPack's 50,000mAh, Mophie Powerstation AC should be enough to give your laptop additional 15+ hours emergency battery.

  3. Omnicharge AC/DC (20,400mAh)

    Omnicharge's 20,400mAh power bank is another easy favorite amongst travelers and digital nomads, and it's easy to see why. This emergency power bank is well-equipped with fast-charging USB ports and a 100W AC outlet that can power your MacBook Pro, MacBook Air, Microsoft Surface Pro 3/4, Lenovo, Dell, HP Laptops, DSLR cameras, and even DJI drone's battery.

  4. MAXOAK Laptop Power Bank (50,000mAh)

    MAXOAK's 50,000mAh power bank is your compact and lightweight external battery pack ideally recommended for Windows-based laptop. This power bank has a total of 6 charging ports: one 20V/5A for laptops, one 12V/2.5A for digital cameras, two 5V/2.1A, and two USB 5V/1A for iPhones, tablets. MAXOAK has a wide laptop compatibility support which includes Dell, HP, Lenovo, Microsoft Surface Pro, Sony, Samsung, Acer, and Toshiba.

  5. AC Jackery PowerBar (23,200mAh)

    Jackery PowerBar 23200mAh external battery pack delivers 85W of power via AC outlet and a few powerful outputs including Quick Charge 3.0, USB C, and 5V/2.4A, making it an indispensable travel companion. This power bank can charge your 15.4" MacBook Pro and other 15'' laptops, GoPros and other hand-held devices.

There you have it! So next time you embark on another beach pilgrimage or go in an adventure, be sure to bring one of these power banks for your laptop!

5 High-Capacity Laptop Power Banks for Your On-The-Go Lifestyle

Near Lock, one of the coolest iPhone apps in the App Store, has just updated their iOS app with full Siri Shortcuts support.

For the uninitiated, Near Lock lets you automatically lock/unlock your Mac when you're near your computer without even touching it. It uses proximity sensor to detect your iPhone's distance and automatically lock your computer if you're away. Once you're near your workplace, Near Lock automatically unlocks your Mac.

Near Lock is really one powerful app that saves you time while keeping all prying eyes at bay, whether at home or at your workplace. You don't have to touch your machine to lock your computer for a quick break or type your password to log back in to your computer.

Now, an even more powerful Near Lock is here with full integration to Shortcuts, a Siri feature introduced last year.

How To Text Blast in iOS - This Shortcut Lets You SMS Bomb Any Number from iPhone

But why bother asking Siri “Lock my Mac” or “Unlock my Computer” when iPhone can automatically lock/unlock your computer when you're near? Isn't it a counterproductive to automation action we expect?

Well, the shortest answer is: Near Lock sometimes miscalculates your iPhone's distance to your Mac. It cannot sometimes automatically unlocks your Mac even if your iPhone sits just beside your computer. And it randomly locks your Mac while you're in the middle of something even if your phone remained just beside your Mac.

Using Siri Shortcuts to Lock, Unlock Your Mac with Near Lock

The unreliability of Near Lock's proximity sensor-based locking/unlocking makes Shortcuts integration a welcome addition to its feature packs. By simply asking Siri “Lock my Mac” or “Unlock my Mac”, that's already a nifty productivity hack.

Here's How To Use Siri To Automatically Lock or Unlock Your Computer

  1. Download and install Near Lock on your iPhone.
  2. Download and install its Mac App. This tiny app simply works as a connector between your iPhone and Mac.

  3. Turn on your Mac's bluetooth and launch Near Lock on your Mac for pairing (you only need to do this once).
  4. Turn on iPhone's bluetooth and open Near Lock on your iPhone. It should instantly scans your computer to pair. Once your Mac is found, it prompts you to enter your Mac's password. This is a one-time setup too.

  5. Now that your Mac and iPhone are successfully paired, click on that tiny Mac icon.

  6. It should bring you this.

    Remember Near Lock's proximity-based auto locking/unlocking unreliability so we will not use that. Leave that un-toggled/disabled as seen above.

  7. On your iPhone, go to Settings > Near Lock > Siri & Search > Shortcuts and define your own Near Lock shortcuts or you can pre-made shortcuts to lock / unlock your Mac.

Send Automated, Scheduled Message on iPhone - No Jailbreak and Third-Party Apps Required

You're done. You can now just say "Hey Siri, lock my computer" or "Unlock my Mac". Here's Siri locking and unlocking my Mac in action:

How To: Automatically Lock, Unlock Your Computer with Siri

Since its debut, Apple Music has seriously got some mixed reviews both from critics and fans alike. Some discontented Apple fans called it “a nightmare” while others lauded it as a refreshing and a nearly perfect music app.

And if you are one of those Apple fanboys who are convinced that Apple Music is the best music app in the planet, then, you don't want to miss out this one cool interoperability feature of iOS and OSX: wirelessly control, play Apple Music on your PC/Mac using your iPhone or iPad as a remote.


DokRemote: Remotely Control Your iPhone, iPod Music Player Via Web Browser

Spotify Connect is one sought-after, premium-only feature of Spotify that lets you control the music from any phone or tablet using the Spotify app. And if you're looking for Spotify Connect alternative for Apple Music, then, good news is you too can have the same wireless convenience at no cost!

Play Apple Music Through Your Speakers, Mac or Apple TV Using iPhone, iPad as Remote

Follow this step-by-step guide on how to remotely control music playback active on your PC, Mac using your iPhone or iPad as a wireless remote.

  1. Download and install Remote on your iPhone or iPad

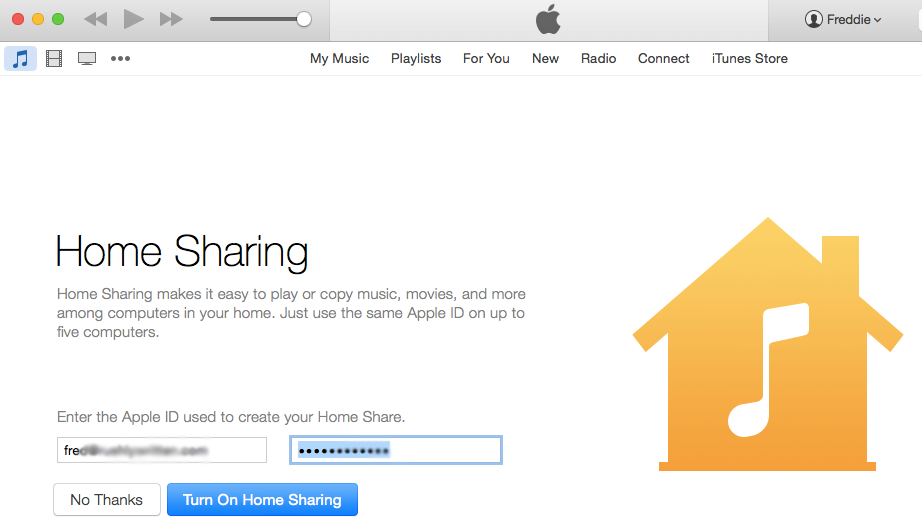
  2. Once installed, enable Home Sharing on your iPhone. You'll be asked to login using your iCloud account. You should see something like this:

  3. Turn on Home Sharing in iTunes on your computer or Mac. Go to File > Home Sharing > Turn On Home Sharing. Once enabled, your Remote app on your iPhone should automatically retrieve all your music collection and display them on your iDevice.

    Use IFTTT As A Spy App: Secretly Copy, Collect iOS Photos on iPhone, iPad (No Jailbreak)

  4. Let's test it. Browse through your iTunes library on your Mac and play whatever playlist/albums you've got. As soon as you hit the play button, your iPhone should automatically pick the track actively playing your Mac, as seen on the video below:

You're done! You can keep the music flowing on your Mac from anywhere in your house using your iPhone or iPad as remote.

Works flawless on my iPhone 5 (iOS8.4) and Mac (Yosemite).

Caveats

Apple's official Remote app for iOS only allows you to choose music you've added on your library. The app can't let you search for new songs in the cloud just like what you normally do on Spotify Connect.

How To: Transfer Large Files Between iPhone and Other iDevices Over Existing Wi-Fi Network

How To: Remotely Control Apple Music on Computer, Mac Using iPhone, iPad

Remember the Software Data Cable for Android I mentioned before? That was really a clever tiny piece of  app that every Android user should install. Why? Well, you better see my previous post about it here: How To: Transfer Files From PC To Android Phone Via Wi-Fi (And Vice Versa).

If you ever wished you could do almost the same thing on your iPhone or iPad and make your life a LOT easier, well, then, you've got to check out PushBullet.

PushBullet is your Swiss Army Knife for anything wireless


As a long-time Android user who just switched to iOS, I hate it when moving files & information from my computer to iPhone is such a difficult feat. The same frustration you get when you copy contents from your iPhone to your Mac or Windows PC. And that's the problem that PushBullet is trying to solve.

What is PushBullet

In a nutshell, PushBullet makes it really easy to send files, ebooks, links, and virtually any  media files from one device to another. Whether you're pushing files from your Windows computer to your iPhone, iPad or Android, the process is absolutely painless. All you have to do is to right-click the file or link and select the destination device and voila, you can instantly go right to that file/link by tapping on the notification you get on your Android or iDevice. And no, you don't have to be in the same wireless network to make PushBullet works.

Browse, Access Your Photos From Your iPhone, iPad To Your Computer Over Wi-Fi

And if you have an Android device, you can even automatically “push” all your calls and SMS alerts to your computer so you  won't miss important calls and text messages even if your phone is on silent mode or in another room. Unfortunately for iOS, PushBullet doesn't have this feature yet. But given the more open iOS8.0+ architecture, I believe this feature is currently in the works (check out the paid app Notifyr for iOS, it works almost the same).

Why is it useful?

PushBullet's homepage already has a detailed information on how it works and how it becomes so handy, but allow me to point it out here.

With PushBullet, you can easily:
  • Send files from your mobile device to your computer with one click (or the other way around)
  • Receive calls, SMS and other phone notifications straight on your computer

And if you're on Android, there are whole lot more you can do with PushBullet like being able to reply text messages straight from your computer.

Final Verdict:

PushBullet is a simple yet powerful push notification service designed to make all your internet-connected devices “work” together. It's a godsend  web service that you will surely appreciate especially if you're dealing with multiple devices. PushBullet is currently available for iOS, Android and as a browser extension for Chrome, Firefox and Opera. There's also an unofficial paid app PushPal for Mac users.

Transfer Large Files Between iPhone and Other iDevices Over Existing Wi-Fi Network

LINK: PushBullet

Must-Have: PushBullet Makes Your iOS, Android and Computer "Work" Together

Few days ago, I ran into a problem trying to embed a 40-seconds video into a website.

The problem:

The short video was too large — about 80MB in size — which doesn't seem to justify the length of the video we need to upload. With that ridiculously large size, we cannot easily upload and make it publicly accessible in the website for some performance reasons (if you're a web guy, you get it).

Since video hosting services like Vimeo and YouTube were not an option at that point, we had to come up with ways on how to minify the video without compromising the quality before finally embedding it to the site. And thankfully, we found this awesome tool called Handbrake.

Optimize, Compress Video for up to 90% (Useful for Web Embeds)

Handbrake is one bad-ass video optimizing software that will surely save your day. It allows you to compress any videos of any format, thus significantly reducing the file size without losing quality. It's lightweight, free, and it just works like a charm.

Here's why everyone loves Handbrake:
  • Great video format support. You can compress any types of videos like .wmv – Windows Media Video File, .avi – Audio Video Interleave File, .m4v, .mov, etc.
  • It is Open Source. That means you don't have to spend a penny
  • It works on Windows, Mac and Linux so everyone can enjoy.

GistBox: The Best Place to Store, Organize Code Snippets and Pastes


Using Handbrake is pretty easy. First, you have to specify the Source video file, define Output settings as well as the Destination folder, then, hit Start. It's that easy. See the demo below (click to enlarge):

LICEcap Is The Best Alternative To Recordit To Screencast & Create High Quality GIFs

The result:


Look at that file reduction I got — from 80MB I was able to shrink it down to 7.6MB. That's 90% reduction!

Still not convinced? Download Handbrake for Windows or Handbrake for Mac and see it for yourself.

How To: Web-Optimize, Compress Videos Without Losing Quality (90% Reduction Guaranteed)

Have you ever thought of watching videos on your iPhone or iPad without the hassle of connecting iTunes and waiting for the movie conversion to finish? Well, we actually feels too restricted with how the big Apple does it.

Thankfully, an app lets you watch movies or clips straight from your PC/Mac without the wire. It's called AirVideo available at the App Store.

For those who haven't welcomed this idea. Imagine yourself holding an iPad, iPod Touch, or iPhone while watching movies at the comfort of your own bed... or at the coffee shop or the airport? Any where with a WiFi would do, without the storage restriction that your iOS device is very limited of allocating all your movie collection.

How To: Browse, Access Your Photos From Your iPhone, iPad To Your Computer Over Wi-Fi

To start using this app, you also need to download the AirVideo server for your computer. Once installed, you could add folder destinations of where your movie collection. Just make sure that all computers and the iPad are connected to one network.

Screen shot 2013-05-01 at 10.45.51 AMOn Mac's Menu Bar, an icon for AirVideo is being shown. Click on Preferences to access more options.

Screen shot 2013-05-01 at 10.46.05 AMUnder Preferences, the user may add Shared Folders as the designated folders you want to view on the iPad.

After finishing the set-up with our computer, we may see it here that the files we chose to be shared can now be seen on the iPad.

2013-05-01 00.01.38The options can either be expandable or collapsible for a better view.

2013-05-01 00.03.27To view the full-screen, just do the finger gesture to create such an option.

The app may look simple as it seems to be, but it's quite powerful if you can toggle some choices under the Settings. It can view Subtitles or even do a conversion and add to iTunes.

Transfer Large Files Between iPhone and Other iDevices Over Existing Wi-Fi Network

The AirVideo app can be downloaded for FREE or bought for $2.99. The value is amazing for an app such as this!

Download: AirVideo Paid Version or AirVideo FREE version


Drey Roque

About the author:

Drey Roque loves exploring the gamut of new developments in the tech arena. Once versed with the knowledge, Drey loves sharing his experiments and experiences with the world. Follow @iam3739 on Twitter

Stream Your Favorite Videos From Your PC/Mac Straight To Your iPhone, iPad

Almost everyone knows how Google Docs works and how multiple users can work on either single or multiple documents at the same time. Now, wouldn’t you want that same capability on other applications? However, you know that is not going happen.

Until now.

How would you react if you found out that a brilliant group of programmers has created a screen share application wherein two users can work on a single application such as Excel or Photoshop? Amazing, right?

Working On Shared Projects? ToodLedo Helps You Get The Job Done FAST

This is the essence of PowWow. It is a very simple application that allows two users to work on an application at the same time, taking turns with their own mouse pointer. The design is for complete collaboration and not just screen broadcasting like that from Google Docs.


PowWow has been proven for such tasks as sharing Google Chrome to write an e-mail together, sharing a Photoshop task, sharing web-coding reviews between two web developers, or sharing paired programmer tasks. In short, PowWow feels as if you are working with someone just sitting beside you, even if the other user is a continent away. So far, most applications can be used on PowWow.

Access, Manage All Files Stored Across Multiple Cloud Accounts All At Once

For the present, PowWow is a beta available only for Mac. A version for Windows will be available very soon. For now, the official site is requesting people to sign up for an e-mail listing so they can be informed later when the Windows version will be out.

Because the Mac version of PowWow is still in Beta, the official site is giving caution to users should anything unusual or unpredictable happens, and to inform the makers by emailing them.


Get A Consolidated View Of All Email Attachments In Gmail — View All Gmail Attachments All At Once

New App 'PowWow' Seeks To Revolutionize The Way We Collaborate Online

Previously on this blog we have talked about YouWave, a high performance Android emulator that makes it easier to run Android on your PC. If you haven't had a chance to check it out, head over HERE.

Modern technology has brought computer desktop applications to be used on smartphones and iPhones. However, what if there are phone applications that you want to use on your desktop?

Add Multiple Tabbing Support To Windows File Explorer With Clover [Must Have]

Introducing Cubiez, the apps that brings your favorite phone apps on your desktop. All the apps on your mobile phone that you love or need to use can now be accessed on any desktop or laptop.

As of date, Cubiez is a free app download, though only the first lucky few who download can avail of the exclusive Alpha version.

Cubiez: Bring Your Favorite Mobile Content to Your Desktop (link)

Cubiez allows your phone apps to be made available at the bottom of the taskbar screen so they are always accessible. Should there be any new content for your phone apps, instant notification will alert you. The platform is also non-intrusive because you never have to leave what you are doing just to check for updates.


Cubiez is very simple to use. All you need to do is to download the free app and then install. A marketplace will appear on the taskbar, the purpose is to choose the phone apps that you like. In one click, installation can be completed and everything will show up on your taskbar. Now, all you need is to do is log into your favorite apps.

Turn Your Laptop, PC Into Wi-Fi Hotspot Without Using Ad-Hoc -- Internet Sharing Made Easy

The mobile apps on your desktop are even made to like, well, like mobile apps, the way you see them on your mobile phone.


Download: Cubiez (Windows)

Cubiez is available only for Windows. However, the developers will soon come out with versions for Mac and Linux.

Bring Your Favorite Mobile Contents to Your Desktop with Cubiez (Windows)

Recently on this blog we have talked about Software Data Cable, a truly nifty Android application that makes transferring of large files between wireless devices less of a hassle. Software Data Cable uses existing WiFi network to move and download files from PC to Android phone (and vice versa).

Software Data Cable is a must-have app for the Android! If you haven't checked it out yet, click here.

Turn Any Printed Documents, Notes, White Board Discussions Into PDF Using Your Phone

If you're wondering about how to do almost the same with your iPhone and Mac, well, then, good news! Deliver for Mac and iOS comes to your rescue when transferring large files over the air.

Deliver Lets You Transfer Large Files Between iPhone and Mac Using Existing Wi-Fi Network

Deliver for Mac and iOS exactly does what the title goes—it delivers files from one Mac or iDevice to another over wireless network. Deliver requires no pesky clicking and configurations and it is extremely fast and easy. All you have to do is download, install, and launch the app on your local network and you're good to go.


Here's a quick guide on how to transfer large files from iPhone to another iDevice over Wi-Fi network with Deliver:

Step 1 Download and install Deliver for iPhone, iPod and iPad HERE. For Mac, get it HERE.

Step 2 Launch the app. It should bring down a quick introduction on how to use it. But here's the gist: tap or click on a little bubble icon.

Note: you also need to launch Deliver on your Mac or any iDevice you wish to send your files to.

Step 3 Clicking on that bubble icon should bring up a list of other devices connected to the same network running Deliver. Just choose the one you want to send a file to and then click or tap the plus button.

Note: don't click the text button (looks like a rectangle with three lines), it's for sending a text message.

Step 4 From the list of available iDevices, just choose what you want and then Deliver will transport your file in an instant. You'll be surprised by how fast your large-sized files make it from your iPhone to your laptop.

Best Motion Detection, Sensor Apps for the iPhone, Android and Symbian

Deliver for Mac and iOS is definitely a must-have app you should install. But just as nobody is saint to give anything useful for free with no flaws, you may also experience frequent crashes on your Mac. Deliver for Mac is a little buggy and the interface definitely needs a face-lift. The iOS version, on the other hand, works perfectly so hopefully the Mac version will catch up soon.

How To: Transfer Large Files Between iPhone and Other iDevices Over Existing Wi-Fi Network